


Until recently, I never encountered a situation where I needed a “yellow interface” in ODI (Oracle Data Integrator). Typical ODI interfaces leverage models that are manually created and point to static objects such as tables or files. On a recent project, I took to ODI to create an automation process that would be used to run refreshes against Hyperion Essbase (native and Planning) cubes. The hardware in this situation utilized the latest and greatest Exalytics servers and I wanted a flexible, dynamic process that was easy to replicate (lots of individual processes) and could leverage the massive resources available with Exalytics servers. Specifically, I wanted to be able to run as many (MaxL) steps in a given job in parallel as possible. I’ll write in more detail on leveraging Exalytics and this ODI process for parallel processing in a future post.
I chose ODI to handle the overall automation as I find it simplifies the creation of automation routines with its built-in functionality. And you can expand on the built-in functionality even further with custom created objects (such as procedures and functions). The automation that I created leverages flat files containing MaxL statements (one statement per line) and “sucks” this MaxL file up into relational tables. These tables are then used to refresh ODI variables and these variables are then in turn used in a set of ODI packages that form the back-bone of the automation. My goal in creating this set up was to have a dynamic process (via ODI packages) that could be easily replicated with a couple tweaks to then create entirely new jobs. I did not want new ODI models and interfaces to have to be created for each new MaxL file (representing a new ODI job, if you will). In that instance (using regular interfaces), an admin would have to create tables in the background, create new ODI models pointing to the MaxL flat file and newly created relational tables and then create an interface using those new models.
I thought to myself, “I want all of this to happen dynamically when an ODI package is run”, and I remembered a discussion long ago about yellow interfaces. I started investigating and realized that leveraging a yellow interface could make the ODI MaxL process almost plug and play. The diagram below shows the high-level processing for the setup that I envisioned.
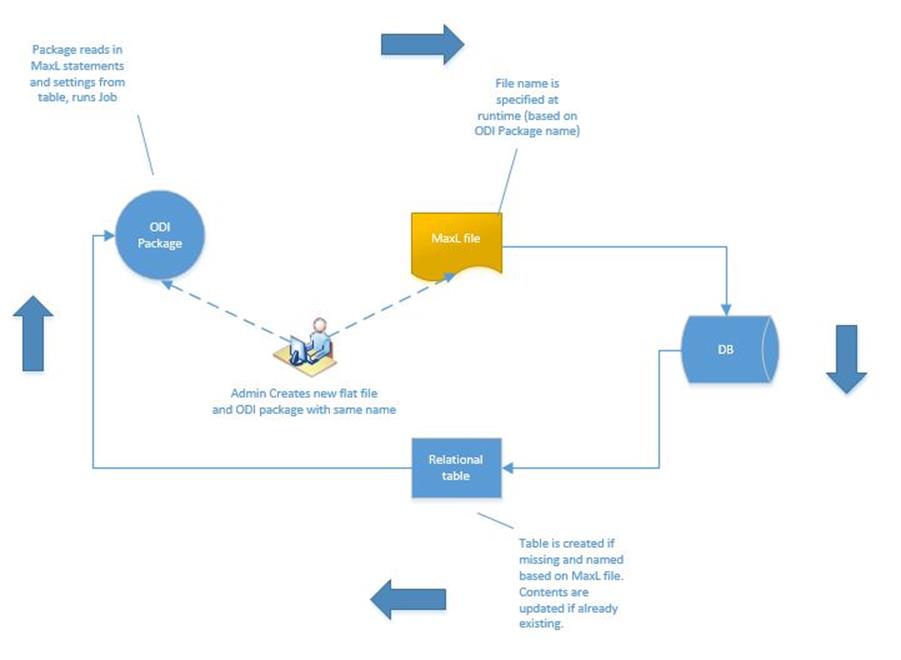
With the MaxL statements read into a table, I could manage how the statements would be executed with more granularity. For example, I could control dependencies between the statements as well as run the MaxL statements in parallel where possible to achieve greater execution performance.
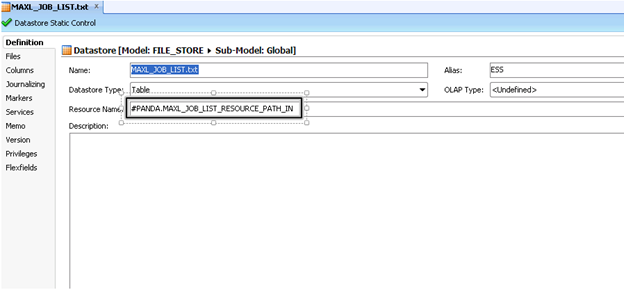
The ODI processing I created uses a yellow interface during execution to import a flat file into a relational table. The name of the file and table are defined at runtime (as ODI variables). With this setup, we only need a single ODI Model for the flat file. As seen in the screenshot below, I created an ODI Model that is used to point to the MaxL flat file to be imported into a relational table. The “Resource_Name” is set to an ODI variable. This setting is the full path to the MaxL file. Now the model will point to whatever MaxL file is specified by the ODI variable “#MAXL_JOB_LIST_RESOURCE_PATH_IN”. Note that this variable is set at runtime based on the name of the ODI package. As you will see the name used for the ODI package will drive the entire process.
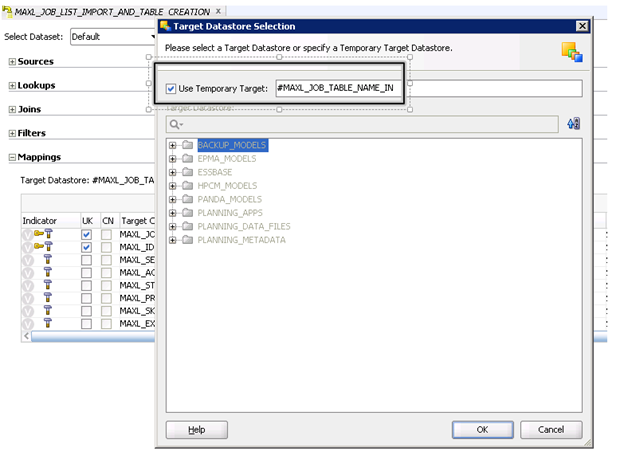
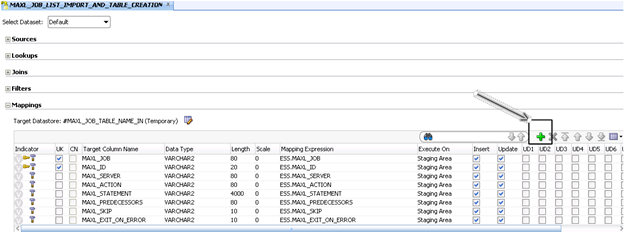
With the ODI Model created for the MaxL file, it’s now time to set up an ODI interface. First step is to create a new interface and use the file model from above as the source. For the target, we are going to specify a temporary target that will be determine by another ODI variable (set at runtime). In the screenshot below, the “Target Datastore” is defined by the “#MAXL_JOB_TABLE_NAME_IN” ODI variable.
To create the target datastore, use the “Quick-Edit” tab. On the “Quick-Edit” tab, click the icon indicated below to open the window where you can specify the Target Datastore details.

After clicking the icon, a window will display where one can specify the target details. Here, make sure to check the “Use Temporary Target” checkbox and the enter the ODI variable that will have the value for name of the table to be created/updated in the relational DB.
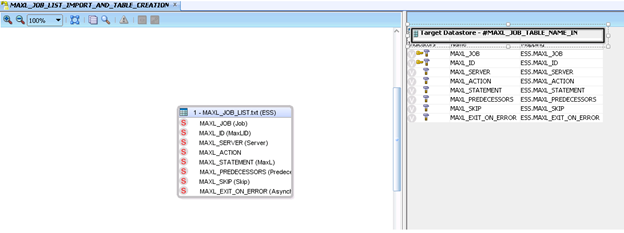
The “#MAXL_JOB_TABLE_NAME_IN” will be set with the same name as the MaxL File and the calling ODI package. This will tie all the pieces together at runtime. After setting the target datastore, you will need to add the columns that you will be mapping from the flat file into the table. Use the “+” on the “Quick-Edit” tab to add each column.
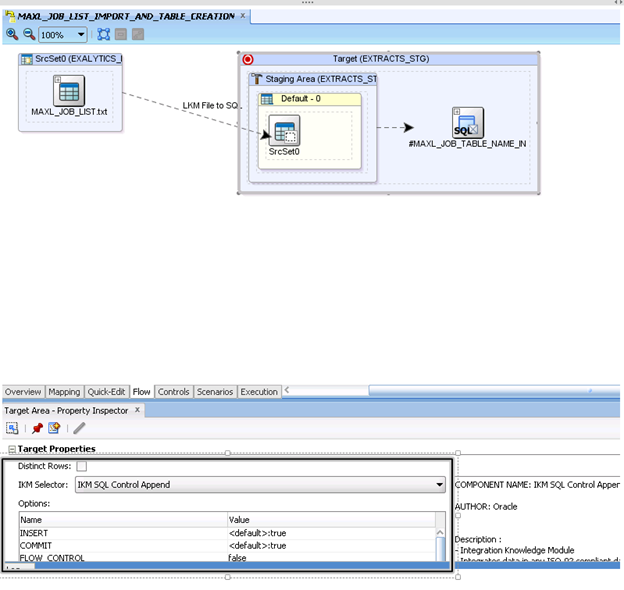
Once the columns are set up, move to the “Flow” tab to set up the IKM properties. In my example, I used the IKM SQL Control Append Knowledge Model to load the flat file to a table.
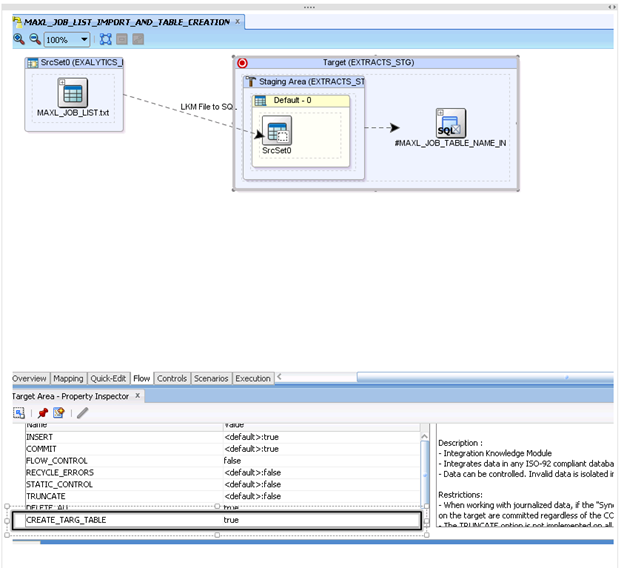
I also set the “CREATE_TARG_TABLE” setting to true so that the backend table would be created if it didn’t already exist. I want any updates made to the MaxL file that is being imported to always be picked up when this interface runs so I also set the “DELETE_ALL” setting to true as well. With these two settings, the table (if it already exists) will be cleared and then reloaded with the file contents. If the table does not yet exist (first time run), it will be created.
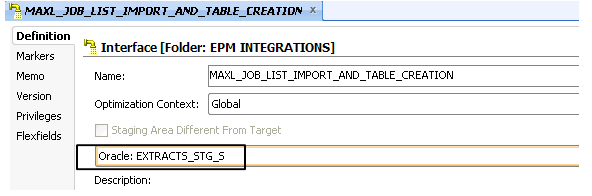
Don’t forget to specify the location where the table will be create. This is based on the setting selected on the first tab of the interface. Here, the table will be created in the schema represented by the “EXTRACTS_STG_S” logical connection.
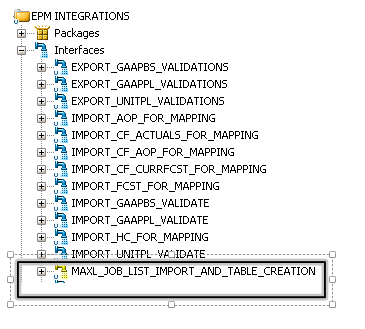
Once the interface is completed and saved, it will show as a yellow interface in ODI Studio.
Now this interface uses a source and a target that are specified at runtime (via ODI variables). I can create multiple ODI packages that will run different MaxL files that leverage this yellow interface. These ODI packages use the package name to set variables and these variables in turn will determine the MaxL flat file that is read in, the relational table that is created/updated and then the processing steps that are read from the table. If a new ODI package (MaxL-based job) is needed, the only steps needed include:
- Create a new MaxL file with the statements to run
- Copy an existing ODI package (with processing, error-checking, e-mailing etc already setup) and change the name to match the MaxL file
- Run the package
The job name (name used for the MaxL file and ODI package) will drive the rest of the processing. The yellow interface will pick up the new MaxL file and create a new table all based on variables. No new data models, tables or interfaces have to be created when a new ODI job (package) is created. This simplified setup speeds up development/creation of new jobs immensely as well as simplifying the process so that even non-techies can begin creating new jobs.